概述
Flume是Cloudera提供的一个高可用的,高可靠的,分布式的海量日志采集、聚合和传输的系统,Flume支持在日志系统中定制各类数据发送方,用于收集数据;同时,Flume提供对数据进行简单处理,并写到各种数据接受方(可定制)的能力。
主要功能
1.日志收集
Flume最早是Cloudera提供的日志收集系统,目前是Apache下的一个孵化项目,Flume支持在日志系统中定制各类数据发送方,用于收集数据。2.数据处理
Flume提供对数据进行简单处理,并写到各种数据接受方(可定制)的能力 Flume提供了从console(控制台)、RPC(Thrift-RPC)、text(文件)、tail(UNIX tail)、syslog(syslog日志系统,支持TCP和UDP等2种模式),exec(命令执行)等数据源上收集数据的能力。
安装
- brew install flume
1 | $brew install flume |
核心原理和概念
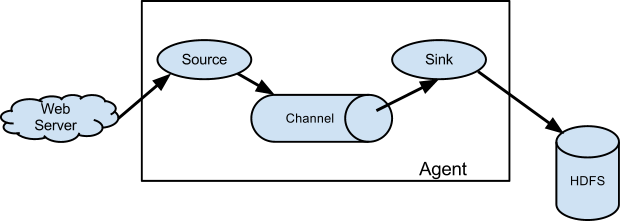
- Flume使用agent来收集日志,agent包括三个组成部分:
- source:收集数据
- channel:存储数据
- sink :输出数据
- Flume使用source接收日志,然后缓存到channel中,最后通过sink将数据输出到目的地。只有在sink将channel中的数据成功发送出去之后,channel才会将临时数据进行删除,这种机制保证了数据传输的可靠性与安全性。
- Flume支持agent串联操作,也就是说可以将上一个agent的sink输出到作为下一个agent的source的输入。
- source还支持接受多个输入,sink也可以将数据输出到多个目的地中
配置和例子使用
- 配置文件在 /usr/local/Cellar/flume/1.6.0/libexec/conf, flume可以接收很多不同的输入源, 也可以输出到不同地方, 首先如果配置文件下没有flume-env.sh, 那么需要 cp flume-env.sh.template flume-env.sh, 然后需要cp flume-conf.properties.template flume-conf.properties, 这个是创建一个flume启动的配置文件。(使用时需要在这个里面进行配置)
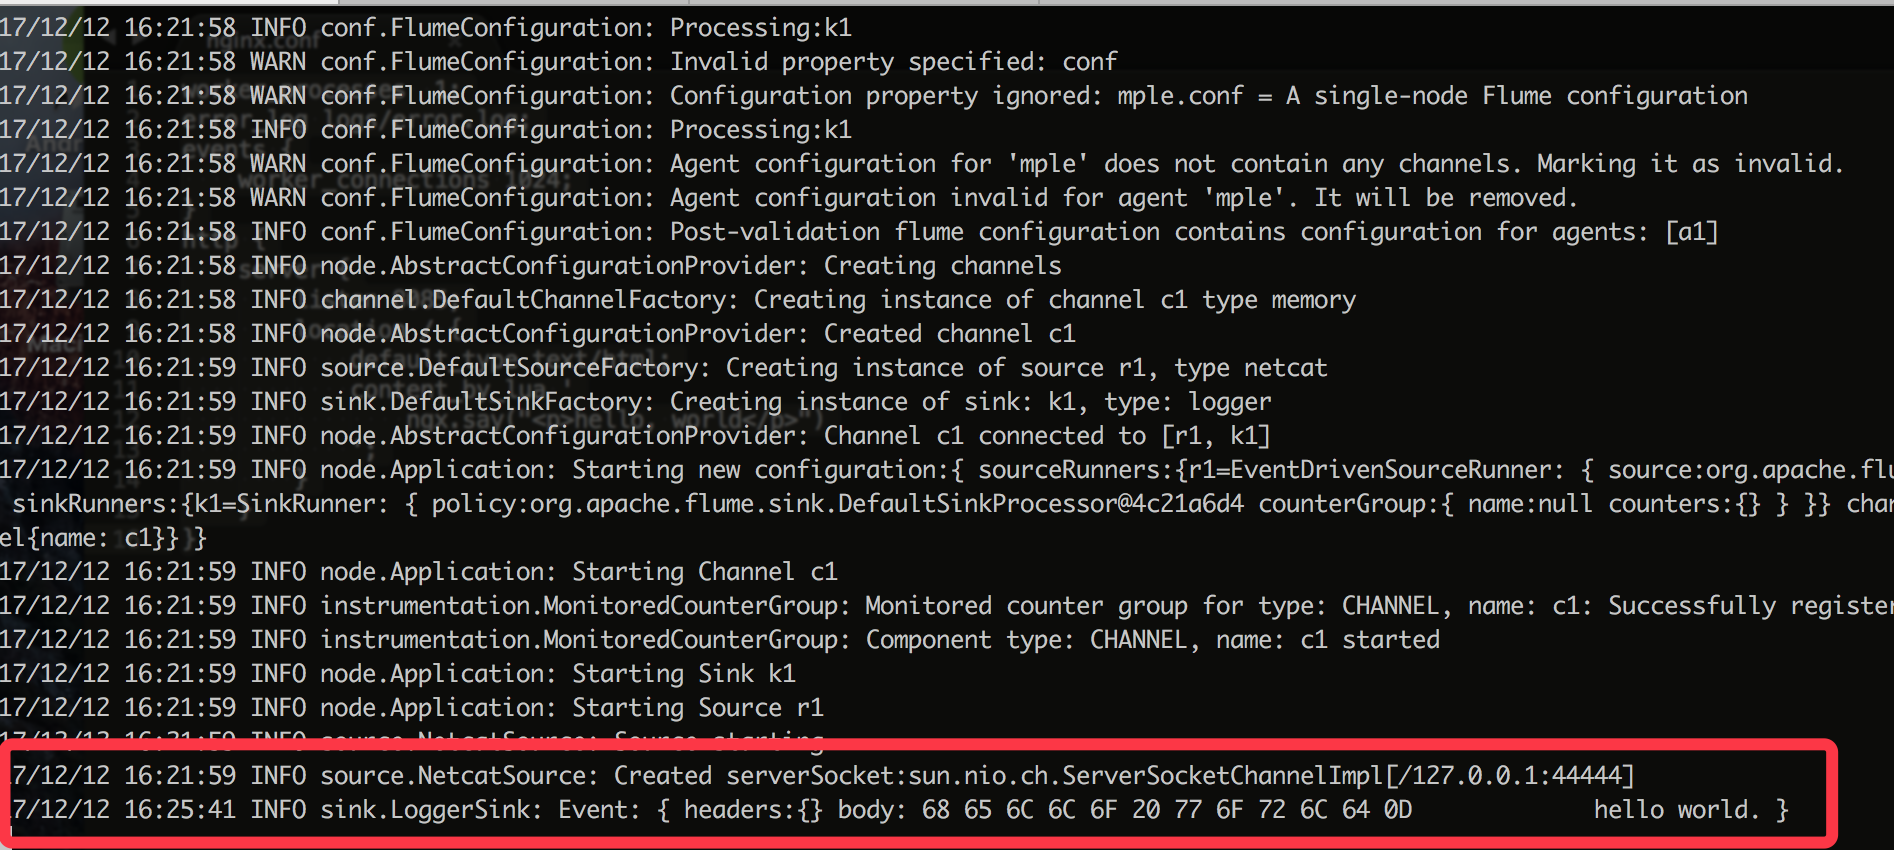
- 运行官方的例子:编辑example.conf 放在/usr/local/Cellar/flume/1.6.0目录下
1 | # example.conf: A single-node Flume configuration |
- 在这个配置文件里面仅定义了一个agent,它的名字叫a1,a1有一个source监听的是端口44444的数据,有一个channel是在内存中缓存event数据,还有一个sink将event数据打印到console控制台。在这个配置文件中配置了多个组件,然后描述了它们的type和配置参数。一个给定的配置文件可以指定多个不同名字的agent,当一个flume进程启动的时候,一个标志会被传进去告诉它启动哪一个agent
- /usr/local/Cellar/flume/1.6.0下启动:
1 | $bin/flume-ng agent --conf conf --conf-file example.conf --name a1 -Dflume.root.logger=INFO,console |
- 另起客户端 telnet localhost 44444
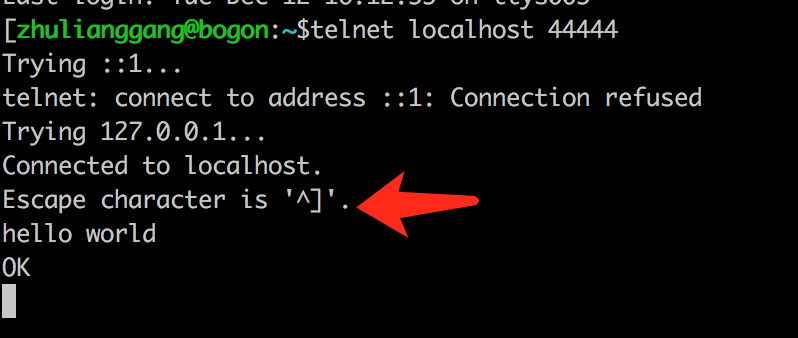
- 查看输出